How to drain water from cellars
Water ingress is one of the worst problems a cellar or other underground space can suffer from and controlling it is crucial. One of the easiest, most practical ways to achieve this is with Aqua-Channel, which is a tough, rigid PVC drainage conduits designed specifically to solve the issue.
 Aqua-Channel is installed all the way around the floor’s perimeter where it meets the wall. Suitable for use in almost any waterproofing situation, the product works particularly well in conjunction with Baseline 8 cavity drain membrane (for walls and floors) and Baseline Mesh membranes (for walls only).
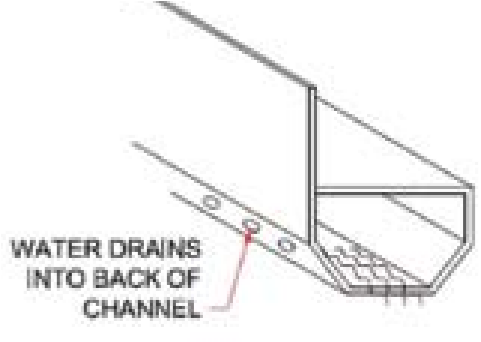
Water that enters into the structure through walls is caught and controlled behind the membrane, from where it is directed to the Aqua-Channel. This allows any buildup of water and hydrostatic pressure to be relieves at the floor/wall junction, which is the most vulnerable part of the system.
Entering the Aqua-Channel via a series of drainage ports, water is then quickly diverted to the appropriate natural drainage outlet. If this is not feasible, then a suitable pump/sump arrangement such as Sumpflo can be installed.
If the existing floor screed or slab is solid and has no cracks or evidence of debonding or water ingress, then Aqua-Channel can be used without the need for flooring membrane, which is especially helpful in areas with limited headroom. A liquid waterproof coating should be applied to the floor as a damp proofing barrier and Technoseal DPM is the ideal product to offer lasting protection.
 Five Steps to Install Aqua-Channel
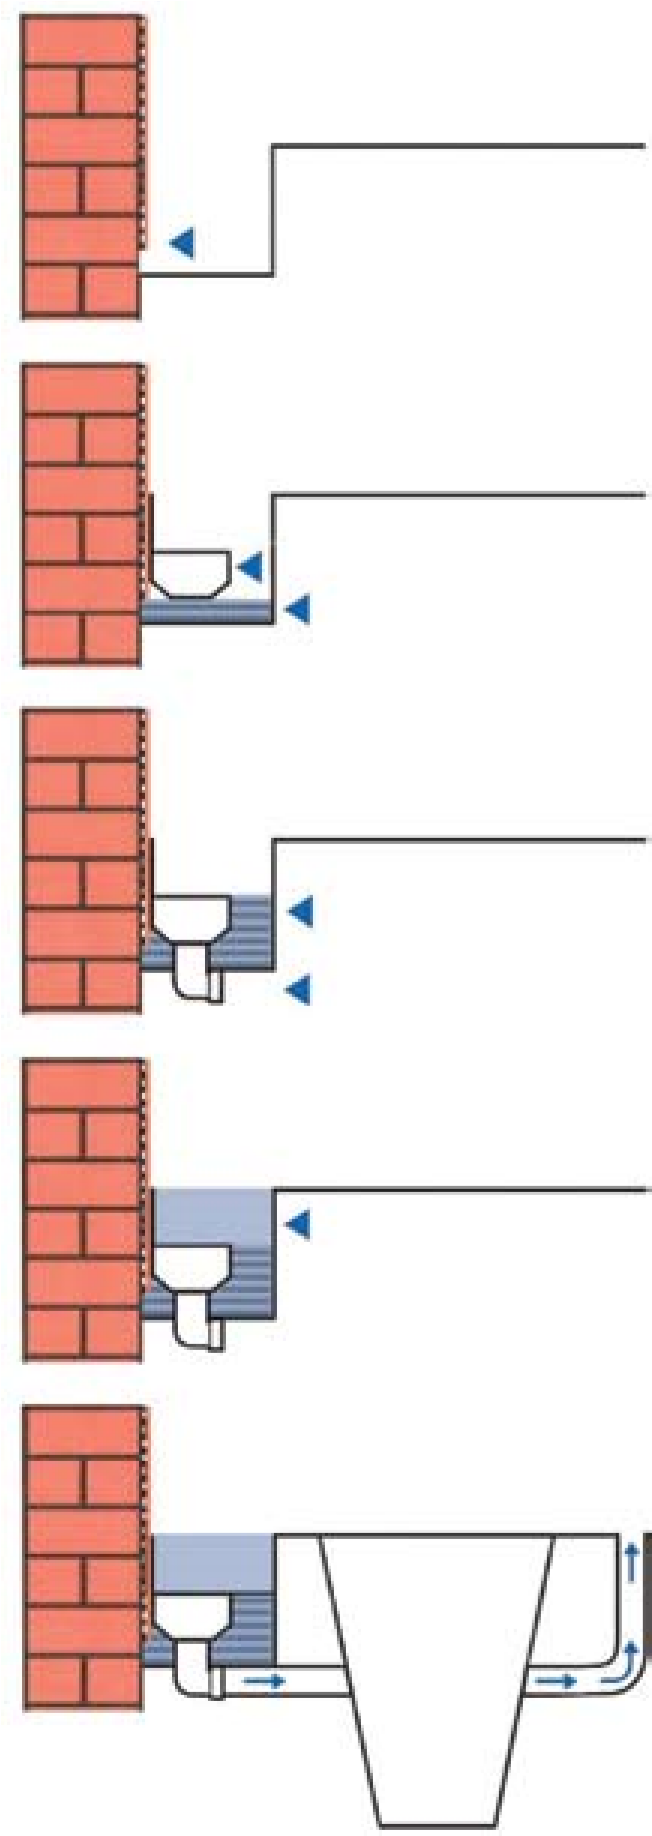
- FORM 100mm x 100mm trough in the floor where it meets the wall, before applying waterproof coating or Baseline cavity drain membrane. You should finish at least 100mm below floor level and up to 30mm from the trough’s base.
- LAY a shallow bed of stone along trough before setting the Aqua-Channel component on top. Make sure that up-stand is flat against the membrane or waterproof coating. Note that the product can be buttjointed where the run is straight and then mitred at the corners.
- CREATE a chase in the floor where Aqua-Channel will feed into sump and then fit the outlet section. The remaining gap (between channel and trough side) should be infilled with 20mm stone, finishing up perfectly flush with the channel’s flat top face.
- RAISE trough to floor level with 50mm sand/cement screed or 20mm stone is used in conjunction with Baseline 8 as part of a fully sealed system of basement conversion.
- CONNECT the outlet section of Aqua-Channel to the drain or sump system.